
TL;DR: Watchout for NIC / USB driver compatibility issues which require a custom ISO otherwise installation should be “normal.”
Intro from Part 1 (skip):
In the fall of 2022, I decided to build a VMware homelab so I could explore Anthos clusters on VMware a bit closer. A few jobs back, I administered VMware and in 2017 I blogged about creating a single node VMware homelab. I thought it couldn’t be that hard to build a multi-node VMware homelab with a few Intel NUCs. I was wrong.
The difference in settings up a single node ESXi host vs. a cluster of 3 ESXi hosts was staggering. Mainly the networking design required.
At first I was going to update my older VMware install posts but, after hitting enough issues, it was clear I needed to start over. My goal is to start with an overview of things to consider before jumping in. Reading my series should save you many hours of problems if you have similar ambitions to build a multi-node lab.
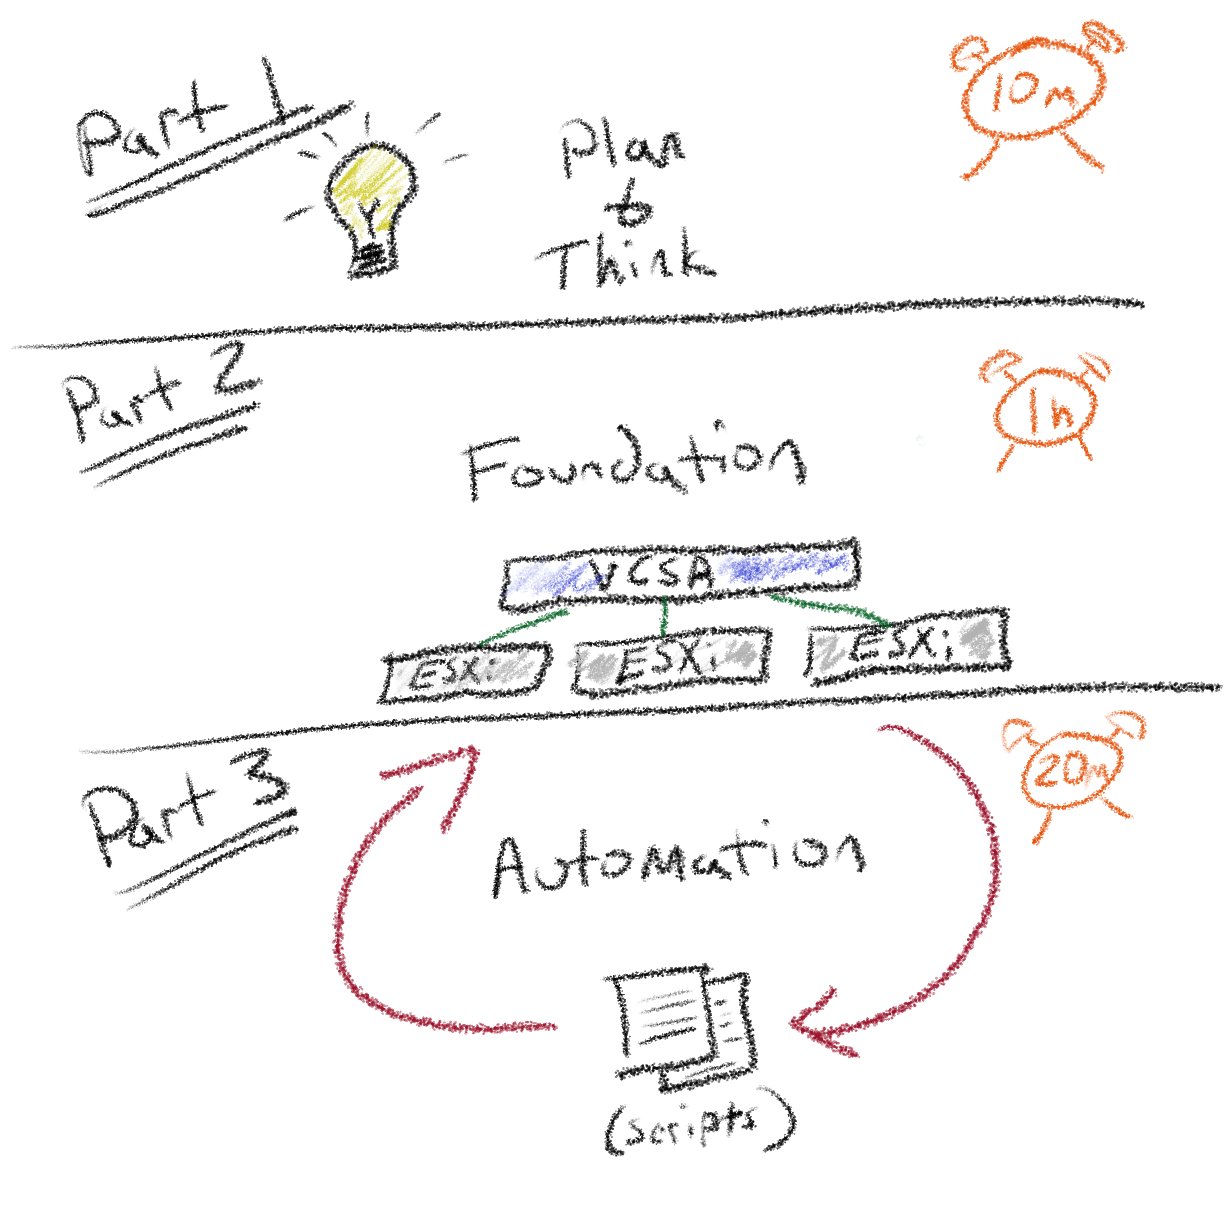
This is Part 2 of a 3 part series I’ve called VMware homelab:
- [Part 1]: Introduction & Considerations
- [Part 2]: How to install a vSphere cluster at home
- [Part 3]: How to configure vSphere networking and storage
Overview
We need to do the absolute bare minimum to get the hosts running and vCenter (VCSA) installed.
Based on the official docs, and compromises required to use unsupported hardware, we’ll perform the following steps:
- Build a custom ESXi installer ISO
- Install ESXi on multiple hosts
- Install VCSA on a single ESXi host
Once we have VCSA configured, the rest of the setup can be scripted (in Part 3) because VCSA presents an API / SDK for managing VMware objects.
Prerequisites
This post assumes you have a few things already:
- A source
VMware-ESXi-#########-depot.zipfile (or ISO) for installing ESXi OS (I’m using the VMUG Advantage / vmugadvantage.onthehub.com) - Software bundle
VMware-VCSA-all-#.#.#-#########.isofor launching the VCSA install - Physical switch configured properly
I also assigned fixed IPs to my hosts, so DHCP “knows” my 3 hosts initially. If you don’t perform this step, ensure you have a way to get the IPs of the hosts.
Warning
I thought DHCP was going to make my life easier, but actually I think having static IPs might be a bit more forgiving when it comes to moving hosts around & configuring VMKernel NICs.
For reference, my VLANs are:
| Purpose | VLAN | Interface | Range |
|---|---|---|---|
| Management Network | 0 (native) | vmnic0 |
172.16.6.0/24 |
| Storage | 4 | vmnic0 |
172.16.4.0/24 |
| vMotion | 5 | vmnic0 |
172.16.5.0/24 |
| VM Network | 64 | vusb0 |
192.168.64.0/18 |
Note
In my homelab, each host has 2 NICs that are different speeds (1G and 2.5G). I made the choice to build the entire lab on the foundation of all operations happening on the 2.5 NIC and all VM traffic happen on the 1G.
If I were to rebuild everything, I might consider running both NICs at 1G and using a single virtual switch with redundant NICs per best practices.
Desired state:

Build a custom ESXi installer ISO
I ran into issues installing VMware 7.0 that required a custom ISO. With VMware 8.0, I no longer have issues with my 2.5G network cards being recognized. I still need to add the USB drivers, but that’s after the OS is installed.
To read how I build a custom ISO with the additional network drivers, see this gist: https://gist.github.com/jimangel/5715263e191e510aabf7ee2a31783556
Install ESXi on multiple hosts
Unfortunately this part is manual, we need to build the foundation.
To install the OS, I plug in a USB-C monitor and USB keyboard. It’d be great to automate in the future, but for now, it’s only a handful of options to select.
Once the USB is selected as the boot option:
<ENTER>to continue installF11accept end-user license agreement- Select the disk to install the OS on (if prompted, choose “overwrite VMFS datastore”)
US Default (keyboard)> Enter- “root” password (
esxir00tPW!) > Enter F11install > (if prompted, confirm overwrite)
Once complete you should see:
Install complete, remove media and reboot!
Press Enter and unplug the installer USB so it doesn’t re-trigger an install on reboot.
Repeat the above process for all ESXi hosts.
Install VCSA (vCenter Server Appliance)
VCSA is the main interface (VM/API/SDK) to manage ESXi clusters and hosts. It’s also a requirement for using virtual distributed switches (vDS). Once VCSA is installed we can automate the rest of the configuration with Ansible.
Installing VCSA is a two stage process:
- Deploy vCenter VM to ESXi
- Setup vCenter to manage cluster
The ISO for VCSA is a bundle of various installers. Do not confuse this with an ESXi ISO that requires a bootable USB.
Stage 1: Deploy new vCenter Server
-
Download the ISO file from VMWare - it should say “all” in the title (ex:
VMware-VCSA-all-####-#####.iso). It’s around 9GB so the download might take some time. -
(optional) If you’re using a Mac, configure Apple to trust the ISO (inspired by this):
sudo xattr -r -d com.apple.quarantine ~/Downloads/VMware-VCSA-all-####-#####.iso -
Mount the VCSA_all ISO and find the UI installer application for your workstation.

-
Click
vcsa-ui-installer>mac>Installer -
Choose Install, then Next
-
Accept End User License Agreement
-
Add ESXi-1 info:
- ESXi host:
172.16.6.101 - username:
root - password:
esxir00tPW! - Accept certificate warning
- ESXi host:
-
Set up vCenter Server root PW for VM
- Password:
vcsar00tPW!> Confirm
- Password:
-
Tiny deployment (2x14)
-
Enable thin disk and chose primary datastore

-
Configure VCSA Network settings
- Network: VM Network
- IP assignment: DHCP
-
Next > Finish
Note
At this point, the VM Network is actually the same as the Management Network. This is because the hosts only see the onboard NIC at boot; so the single NIC shares all responsibilities by default. We’ll install the USB NIC drivers in Part 3.
Once complete you should see a similar screen to:

Stage 2: Set up vCenter Server
In the same application, the second stage should now appear. Click Next to proceed to the vCenter Server Configuration Setup Wizard.
- vCenter Server Configuration > Next
- Time synchronization mode: Deactivated
- SSH access: Deactivated
- SSO Configuration
- Single Sign-On domain name:
vsphere.mydns.dog(can be anything or left default) - Single Sign-On password:
VMwadminPW!99
- Single Sign-On domain name:
- Next > Join CEIP > Finish > “OK”
Once complete, log in to vCenter using the VCSA URL/IP:

Single Sign-On username:
administrator@vsphere.mydns.dogSSO pw:VMwadminPW!99
Next steps
We now have 3 hosts with management IPs (default). We also have a VCSA appliance configured on the same network.
Most importantly, we have an API to automate the rest of the configuration and setup in Part 3 of the series using Ansible.
Check out Part 3 here: [Part 3]: How to configure vSphere networking and storage